


For this next episode in our fly tying series, I have chosen my absolutely favorite wet fly...
Introduction
For this next episode in our fly tying series, I have chosen my absolutely favorite wet fly. I must admit, however, that the BeadHeart Cactus is a fly which I excluded from my repertoire for some time.
But I am now beginning to return to it, dusting off its former beauty, and demonstrating its success
and modernity with new catches.
To be honest, when I first developed this fly I wanted to just completely avoid copying old well-known and simple palmered wet flies. I tried to create an original pattern that would surpass all other similar flies in respects such as appearance, tying style, and mainly the effect on fish - in short a rebel among wet flies from top to bottom. I was pleasantly surprised that my wish was fulfilled, and this fly became my long-time Fly No. 1.
Right from the first "wetting", I experienced beautiful days full of fish, and was grateful to the fly that I had tied the evening before, combined with fishing tactics chosen to be most appropriate for this pattern.
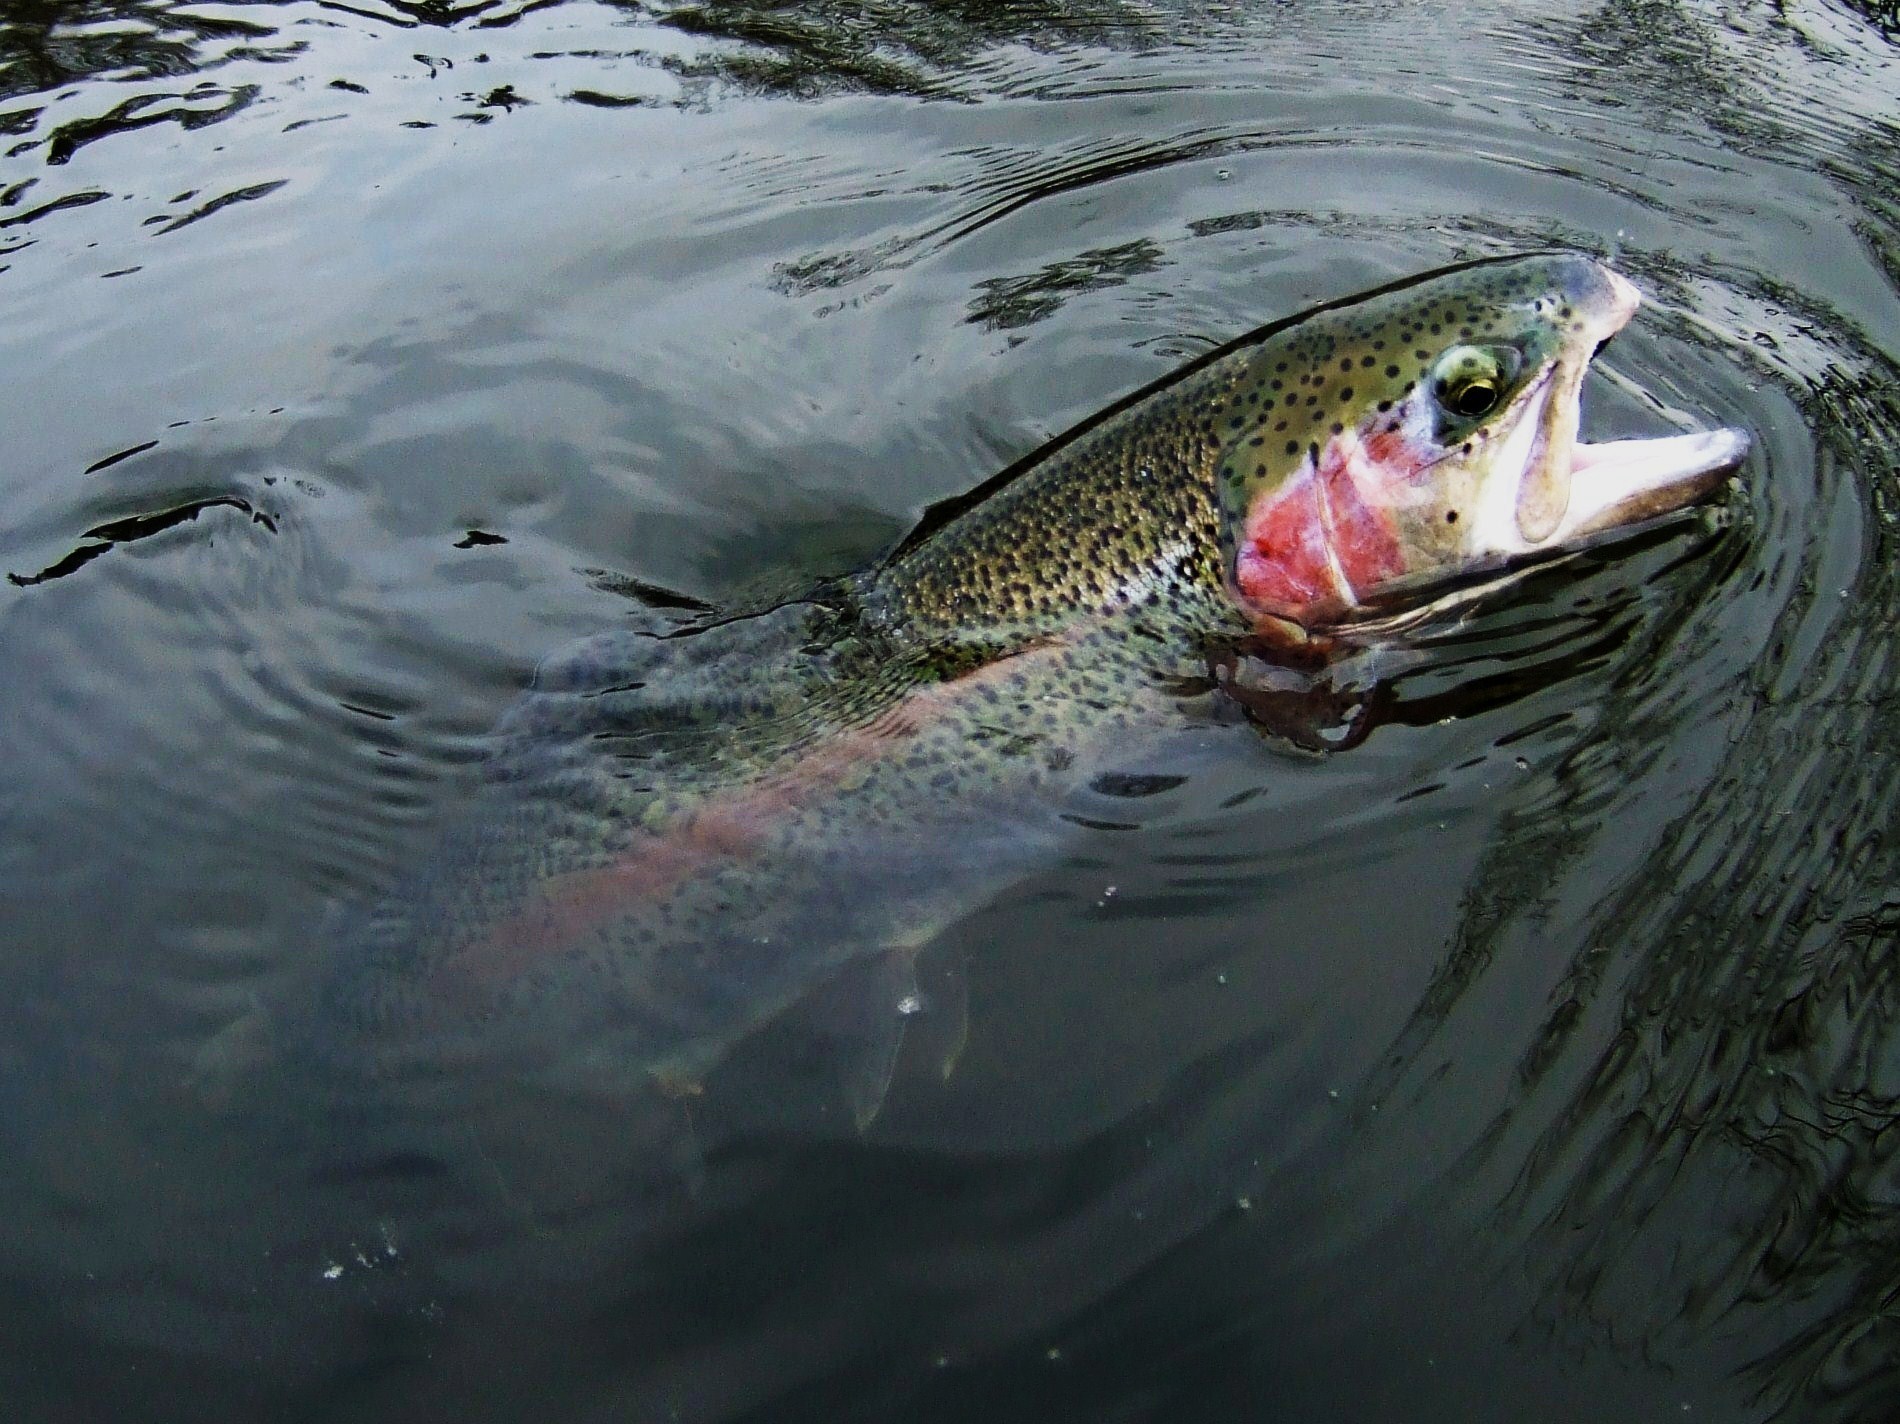
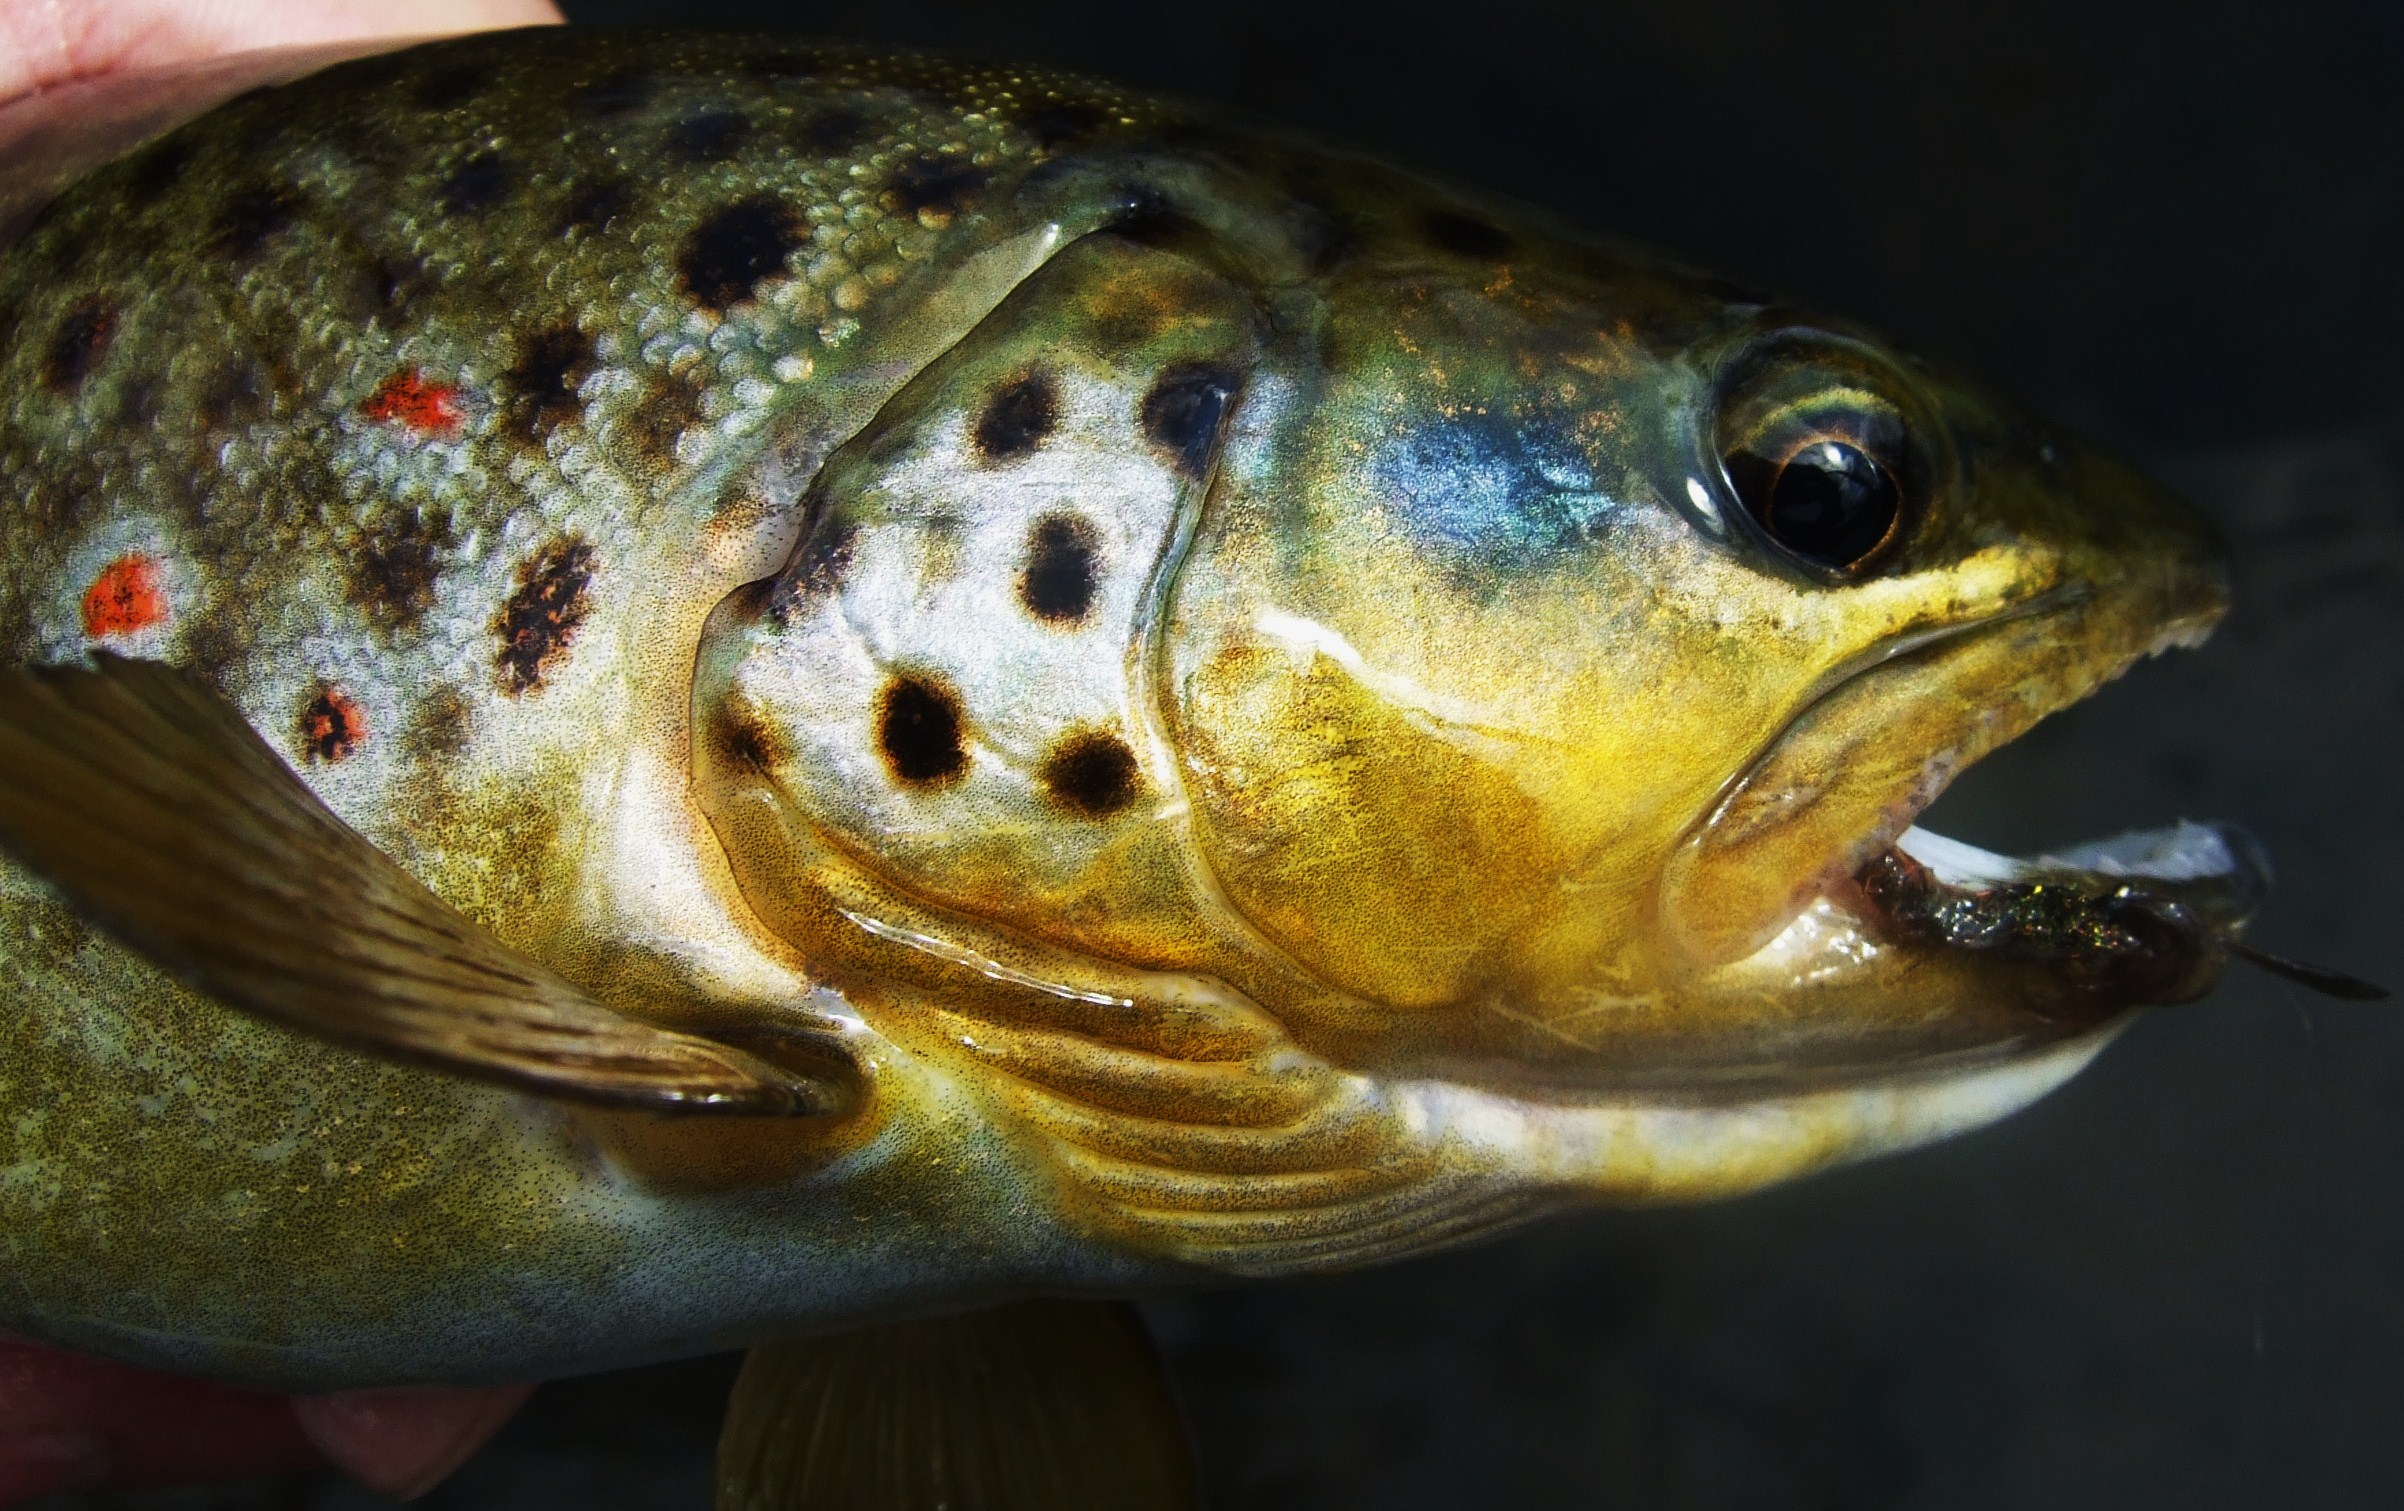
The BeadHeart Cactus mainly proved to be an excellent natural wet lake fly. Its uses don't end with this type of water, however. I have used it with success in running waters and landed many wonderful specimens of both rainbow and brown trout.
Despite this, I must say that the BeadHeart Cactus shouldn't be typecast as a trout fly. For instance, it can also be used to fish for carp - especially during the heat of summer when carp bask under the surface, as well as for chub and other whitefish.
This is truly an original fly and I am excited to discover its further hidden potential.
How to fish:
For lake fishing, I certainly recommend the following strategy as being the most appropriate. Retrieve using intermediate to large figure eights (depending on what the fish require at that moment) using intermediate or Hower fly line with two flies on the leader. I must point out that when using this fast style of leading the flies, the stiff rooster hackles in the palmered legs aren't at all a disadvantage!
My set up of wet flies: Whenever I fish with the BeadHeart Cactus - black original, I always use the same pattern on the dropper but differently colored (e.g. olive, orange) and in a smaller size, which acts as an attractor drawing the fish's attention to the natural tip fly. For lake fishing I never use more flies. I rather use an effective combination of two flies I believe in and whose combination feels right to me.
More flies means a longer leader and more chance of tangles, with no increase in effectiveness (shorter leader with two flies vs. longer with three flies = flies are in the water for the same time from the fish's point of view).
For river fishing I've never used the Cactus in classical wet-fly fashion, but rather choose a one-size larger fly (size 8-10 hook) on a tapered leader (cca 1.5 meters long) that I fish up stream in dry-fly style with floating line. The fly drops through the water column in deep pools, and trout don't wait long to strike hard and fast!
Tying materials used:
Hook: For an original look I first used a gammarus barbless hook to give my fly a non-traditional design, but later realized that this contributed to fewer fish getting off the hook. This type of hook sits better after setting and the shank doesn't create any leverage when landing. The hooks H300BL from Hanak Competition are well suited, sized 8-12, and have a perfect bend length.
Thread: Best is to use the same color as the body material. I personally like to use fine double stranded micro thread. The main aim is to tie in each material, using lacquer between each step to prevent untying.
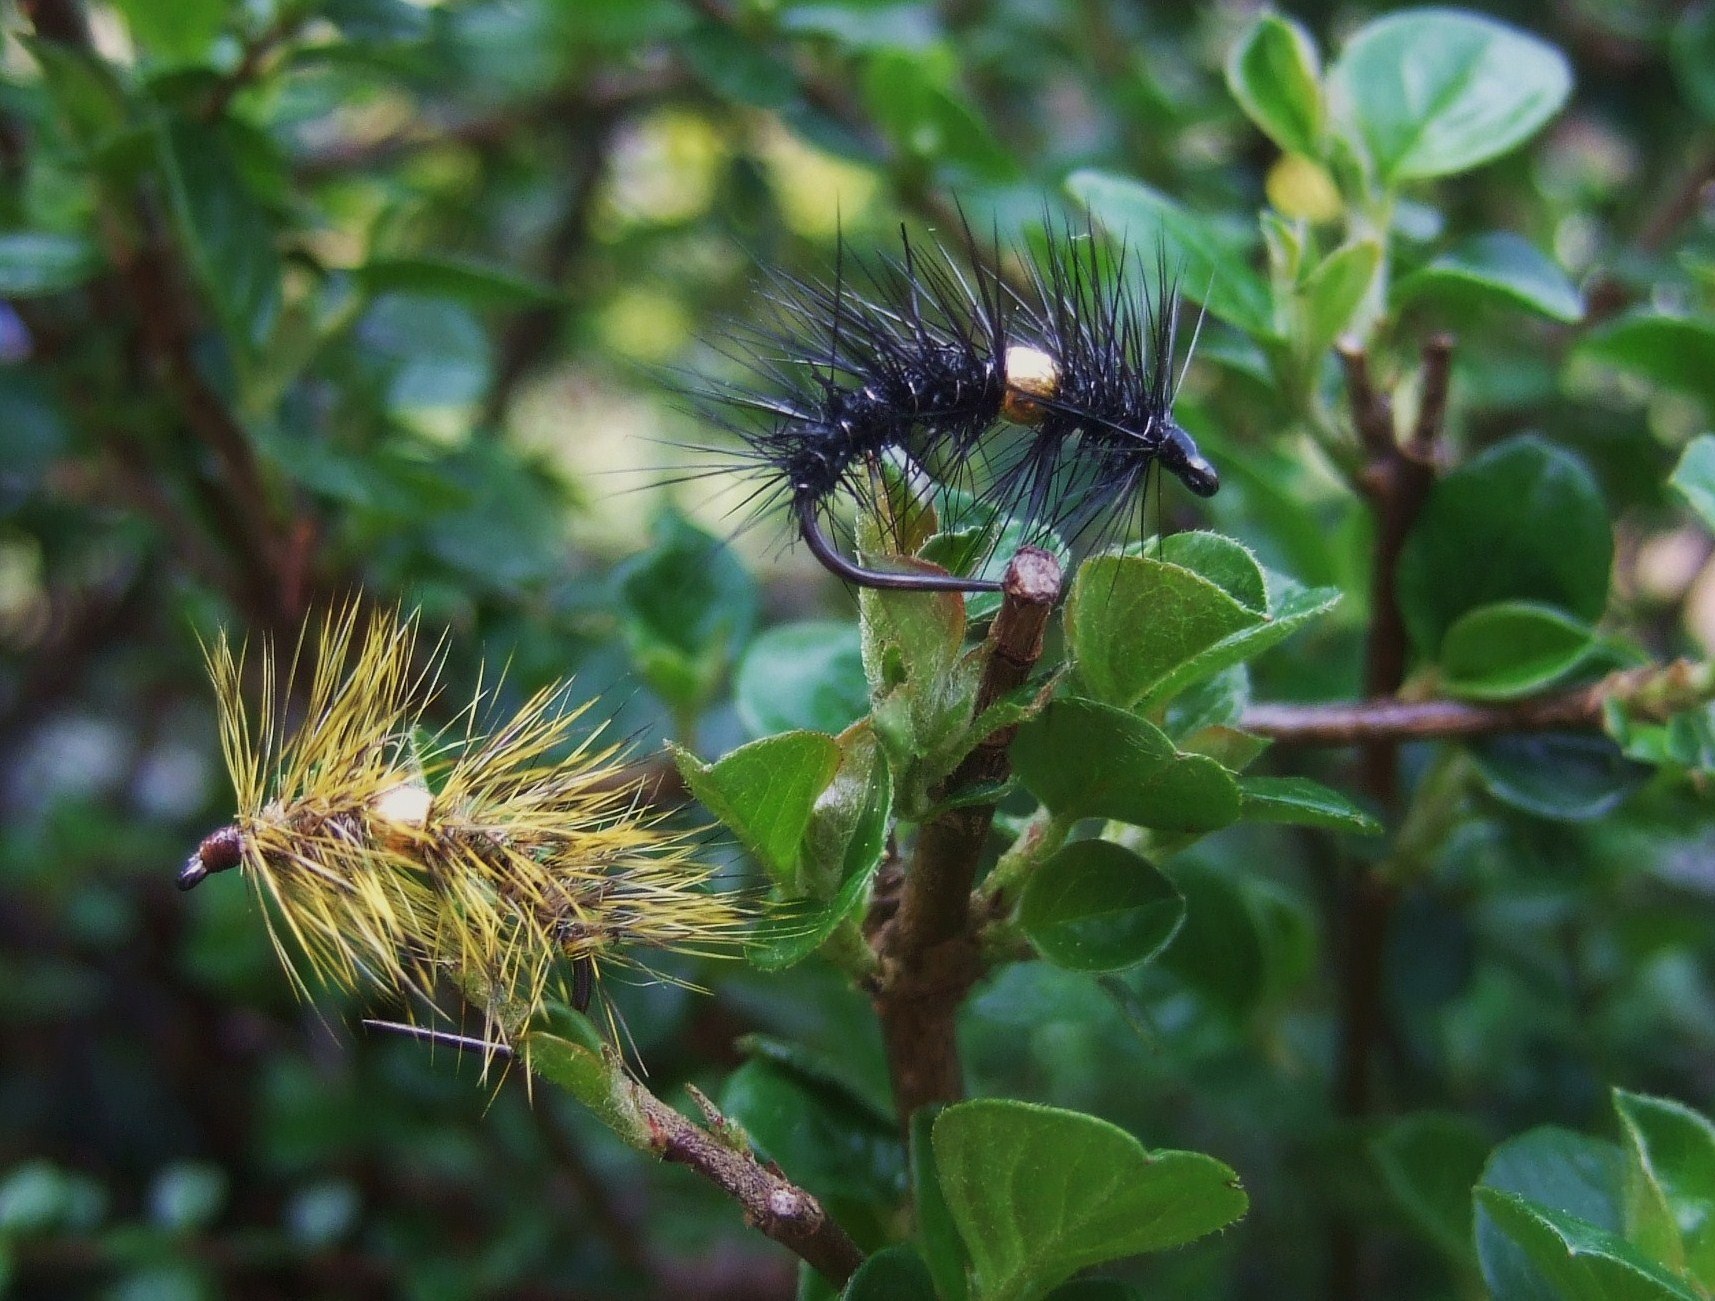
The "heart": This creates a very interesting effect, contributing both to the overall non-traditional look of the fly and its attractiveness to fish. I usually prefer to use classic bead-head beads in gold, silver, or copper, with the diameter matching the overall silhouette and size of the fly. Too large a bead doesn't look natural on the fly body and makes the fly drop through the water too fast (the same applies to tungsten). Too small a bead won't be visible, markedly decreasing the attractiveness of the fly. Various plastic beads in fluorescent colors (orange, chartreuse) are an excellent alternative, especially for newly stocked fish and for whitefish.
Body dubbing: The structure itself is not too significant, since in the water it isn't an important factor, but mainly creates the fly's foundation color on which the legs will be densely palmered. For lake flies and nymphs I tend to use a rougher dubbing. Seal is an automatic choice for me, and I can't resist tying in a small amount of "enlivening" fibers of synthetic microflash, which just increases the fly's affect. My number one color is black - i.e. original. Other excellent variants are olive, green, golden brown, or bright orange (see the Soldier palmer), and other variants will certainly find a place in your fly box. My primary is aim has never been to fish based on wildly over-colored flies, but rather favor more natural colors used to fish careful native fish.
Legs: I only use high-quality symmetrical hackles from genetic rooster, which are mostly used for tying a beautiful shiny and dense hackle ring in traditional dry flies (Whiting, Metz). The symmetry and constant length of the hackle - legs - are very important in this fly. In the colors black, brown, honey, grizzly (olive, orange).
Wire: I use fine gold and silver wires for natural patterns. For colored dropper patterns I try to adapt the wire color to the body and harmonize the overall impression, or the opposite - create contrasting windings.
Of course the wire mainly serves as firming and winding material. Thread can be substituted without problem.
Head: I tie in thread the same color as the fly or effect thread (Hends) for creating another enriched distinct element of the fly. I then lacquer the shaped head to prevent the whole fly from unraveling.
Variations and individual steps
Description of tying:
Step 1: Thread a gold brass bead onto a barbless hook and fix onto the vice.
Lacquer the hook shank and tie on tying thread, winding up to the hook bend to create a stable base for the fly body.
Return to the starting point and prepare the thread for the next step.
Step 2: Attach silver winding wire to the shank with tying thread and with tight winds move up to the hook bend.
Step 3: To half-way down the shank dub in the body with black seal fur. Seal fur is among the more difficult materials to dub, so make sure that the thread is holding well and during forming the body it doesn't come off and that the body is symmetrical.
Step 4: Tie in the black rooster hackle for making the palmered legs.
Step 5: At this phase palmer the back half of the body with black rooster hackle. When making the leg windings, keep the hackle constantly tight in order to prevent creating unwanted loose winds. As soon as we wind the hackle to the end of the body, take the wire in the other hand and start to wind up the body, firming up the palmered legs. Position the wire between the hackle windings such that no hackle quills become pinched to the body. When we get the wire up to the front half of the body, tie it down with tying thread, trim it off, and pinch off the rest of the black hackle from the tail of the fly.
Step 6: At this point, we finish up the first part with a number of knots, lacquer, and then move the gold bead down to this finished part. This creates the "heart" of the fly.
Step 7: Tie in thread for the front thorax part of the body. The same as in Step 2, attach the silver winding wire.
Step 8: Dub the black seal fur to the fly thorax and change tying thread to black silk thread with which we will form the head. The original thread is of course tied off and trimmed.
Step 9: Tie in black rooster hackle.
Step 10: Firmly palmer the rooster hackle on the thorax. At the heart, finish palmering and wind around the legs formed with silver wire, tying off at the hook eye. Trim off the extra wire and create the black head.
Lacquer the head twice, and the fly is finished!
A word in conclusion:
I hope that you enjoy tying the BeadHeart Cactus wet fly and that this fly will bring you many beautiful moments returning fish to the water. To all polite fishers I wish a great trout season, and until next time!
Catch & Release Forever!